Windows Defender Offline Scan
To perform a Windows Defender offline scan, use the offline scan feature. Open the Start Menu and then click open Settings. Next, click on Update and security and then select Windows Defender, to open the following Windows Defender Offline settings. Here, under Windows Defender Offline, you will see a Scan Offline button.
When you click on the button, within a few seconds, you will see the following message. You will be signed out, and your computer will restart.
Windows Defender boot time scan
On restart, you will see a black command prompt window flash open and shut instantaneously, and then you will see the following message for a few seconds.
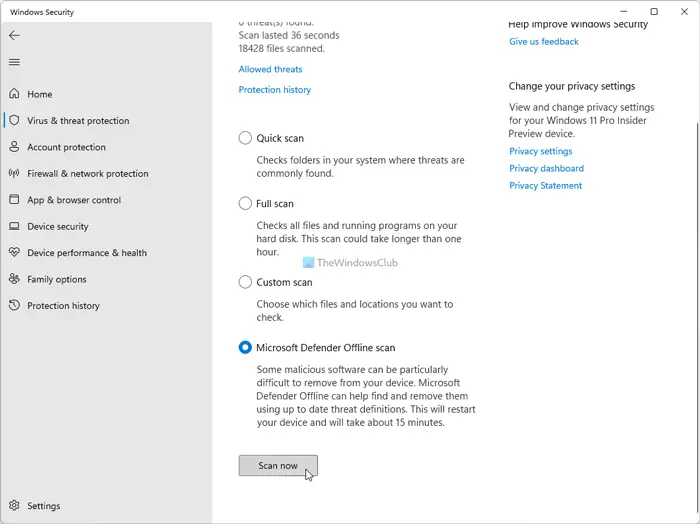
The scan will then run. You may see a black screen, with the circular animation at times, and within 15 minutes, you will be booted to your desktop. In my case, the scan took around 5 minutes. If any malware files are found and removed, you will be informed via a notification. UPDATE: In Windows 10 v1703, you will be able to access Windows Defender Offline Scan setting via Windows Defender Security Center. Click on Virus and Threat Protection link and then on the blue Advanced scan link to open the following window.
Here you will see the option to run Windows Defender Offline scan. This feature is different from the Windows Defender Offline Tool, which can be run from a removable media like a DVD, or USB drive and can be used to boot your PC, and then run the scan.