Grouping Objects in Word manipulates the image to come together as one. When you move the object, they will move together. In this tutorial, we will explain how to group objects in Microsoft Word. In this post, we will show you how to group shapes, pictures, text, and objects in Microsoft Word.
How to group Objects in Word
Open Microsoft Word.
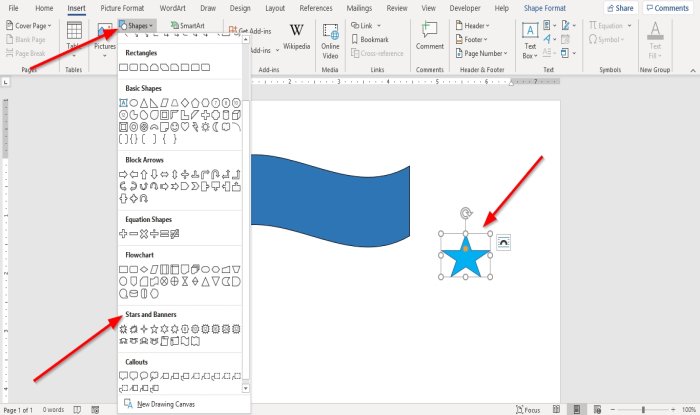
Draw an object in your word document. Click the Insert tab and click Shapes in the Illustration group and select a Banner and a Star from the Star and Banner category. You can color the shape of the star and banner if you want.
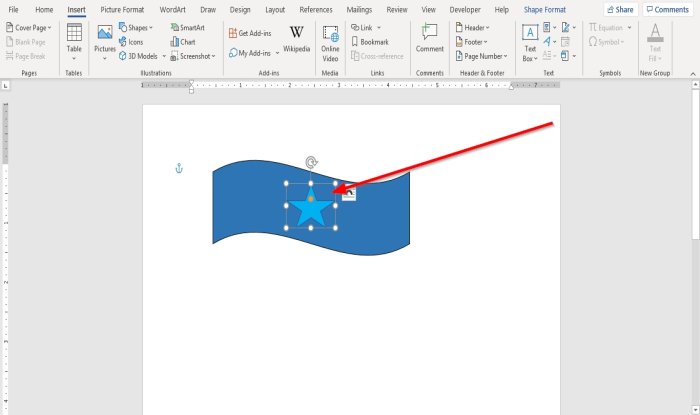
Place the star on the banner by clicking on it and dragging it in the middle of the banner. If we try to move the object, you will see that that they are not moving together as one object. We want it to be a complete picture, so we can move it together when we are moving it.
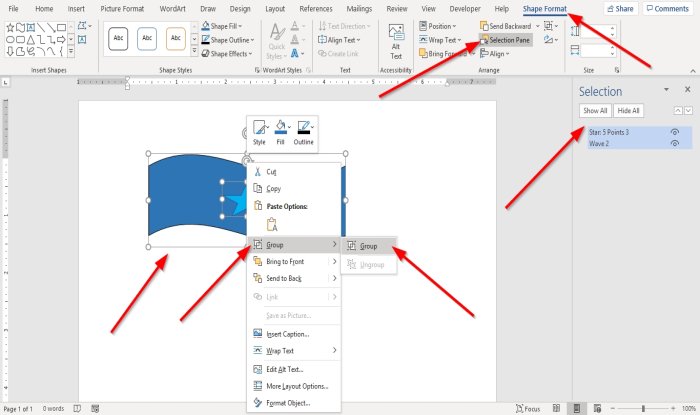
Now, we will group the picture. Click on the Shape Format tab; if you have not seen it, click on a shape, and the Shape Format tab will appear. On the Shape Format tab, in the Arrange group, click the Selection Pane. A Selection Pane window will open on the right. Click one of the shapes in the window and press CTRL + SHIFT and click to select the other one. In the document, you will see both are selected. In the word document, right-click an object; click Group in the drop-down list; you will see two options Group and Ungroup. Select Group.
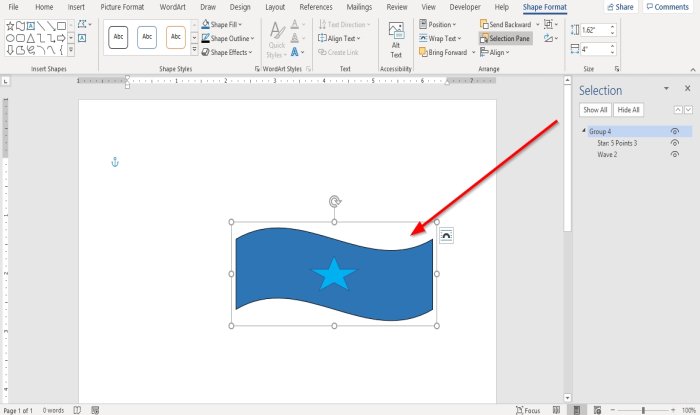
The objects are grouped. Now they can both move together as one image. I hope this is helpful. Read next: How to insert Section Breaks in a Microsoft Word document.