It will look similar to when you have multiple versions of OS installed on your PC. Let’s learn about it!
Add Safe Mode to Boot Menu options in Windows 11/10
Windows 11/10 has Advanced Startup options now which lets you directly boot into Safe Mode without restarting, and then pressing the special key multiple times. However, if you need to use Safe Mode often, its best to add it as an option. From the WinX menu, select ‘Command Prompt (Admin) to open CMD. Type the below-mentioned command and press the Enter key:
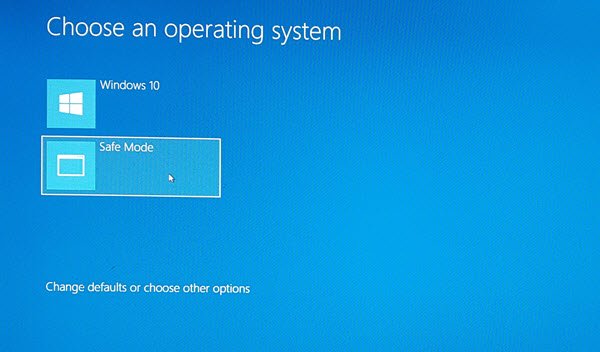
You should see the following message: The command adds Safe Mode entry in the Boot menu which means that you can directly boot Windows directly in that mode. To verify, the Safe Mode was added to the boot menu, you will need to open MSConfig. You will then have to use it to configure boot settings for the ‘Safe Mode’ entry. Type msconfig in the Run prompt, and hit Enter. Switch to Boot tab, and look for Safe Mode option. It should be available right under the default Windows 10 mode.
You have to select the Safe boot option and also select Minimal. After this select the Make all boot settings permanent option. Also, make sure to increase the timeout to at least 10 seconds. This will make sure that the menu doesn’t disappear too quickly. Similarly, you can add Safe Mode with Networking and Safe Mode with Command Prompt entries too.
For Safe Mode with Networking you have to select – NetworkFor Safe Mode with Command Prompt you have to select – Alternate Shell
Once done, click on Apply and restart your computer. You will see the changes in your Boot Menu! To remove the entry, you need to open msconfig again, select Safe Mode and click on Delete. Hope this helps.