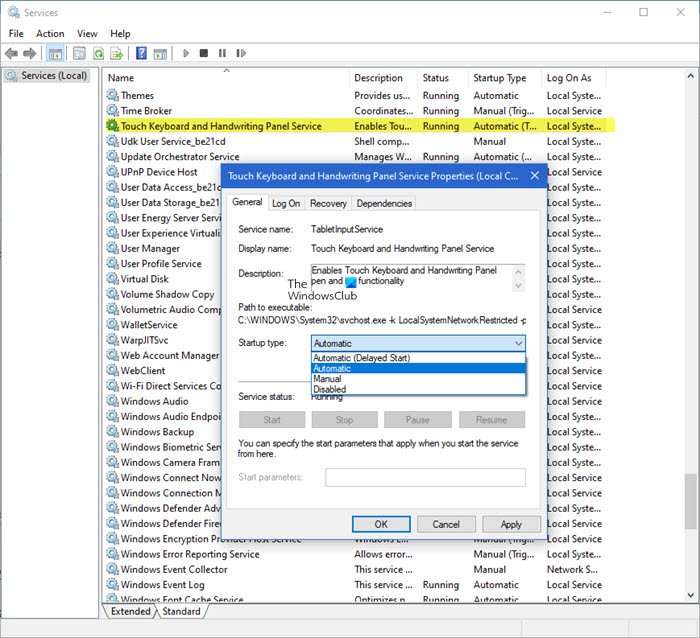
How do I enable Touch Keyboard and Handwriting Panel Service?
To enable Touch Keyboard and Handwriting Panel Service, follow these steps: Press Win+R in combination to open the Run dialog box. In the empty field of the box, type Services.msc and hit the Enter key to open the Services (Local) editor. Inside the Services Manager, locate Touch Keyboard and Handwriting Panel Service entry under Name section. When found, right-click the entry and select Properties from the list of options. When the Properties dialog box appears, switch to the General tab. Now, scroll down to Startup type section. Hit the drop-down button next to it to expand its menu. From the list of options displayed therein, select Automatic and hit the Ok button at the bottom of the window. Once done, restart your PC to allow the changes to take effect. Following the restart action, the service should auto-start, and the dialog should no longer appear. If this does not work for you and the settings keep reverting, then you may need to perform Clean Boot and troubleshoot the issue and identify the interfering process manually.
What does Touch Keyboard and Handwriting Panel Service do?
As mentioned earlier, this Windows Service enables Touch Keyboard and Handwriting Panel pen and ink functionality and is required to use the typing and touch features.
Can I disable Touch Keyboard and Handwriting Panel Service?
If you disable this service, you may not be able to type in the Start Menu, Settings, UWP apps, Terminal, etc.
Windows Terminal displays Touch Keyboard and Handwriting Panel Service is disabled warning
Starting in Windows Terminal 1.5, the Terminal will display a warning if the Touch Keyboard and Handwriting Panel Service is disabled. This service is needed by the operating system to properly route input events to the Terminal application. If you see this warning, you can follow the above-mentioned steps to re-enable the service. That’s all there is to it! Read next: Windows Touch Keyboard Settings, Tips and Tricks.

