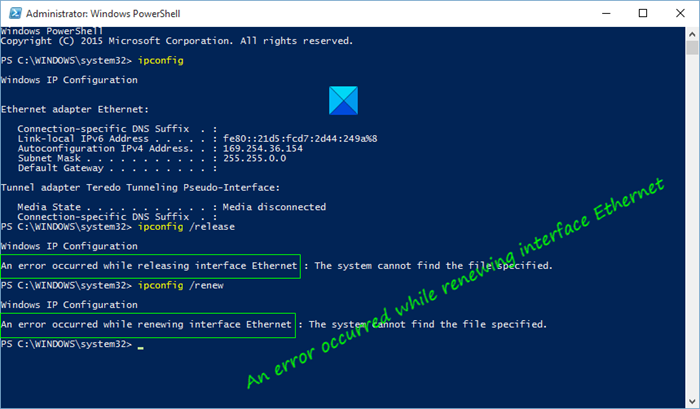
Ethernet Access is deniedUnable to contact your DHCP serverThe name specified in the network control block is used on a remote adapterAn attempt was made to access a socketThe RPC server is unavailableThe object already existsThe data is invalidThe DHCP client has obtained an IP address that is already in use on this networkThe operation was canceled by the user
These errors can be because of IP address conflict or maybe there is a problem in your Network setting, or with a Network Adapter, or with the Router. Whatever the cause of the problem is, we have few methods, to resolve this issue.
An error occurred while renewing interface Ethernet
These are the things you can do to fix the “An error occurred while renewing interface Ethernet” error. Go through the entire list and see what may apply in your case: Let us talk about them in detail.
1] Run Windows Network Diagnostics Tool
The various Network Troubleshooters of Windows OS can fix the Network Connection issue. If this method does not work, we will see some other methods, but first of all, allow the troubleshooter to fix the issue. So, to get started with it, right-click on your network connection icon in the Windows taskbar and select Troubleshoot Problem to run the Windows Diagnostics tool. Finally, select the Ethernet that’s giving you trouble and click Next. Windows will automatically scan your network configuration and device to identify any potential problems. If it detects the problem, it will show you the problem and ask your permission to solve it automatically. Most probably Windows will diagnose the error. After troubleshooting the error, release and renew the IP Address to check if the issue persists.
2] Reset Winsock, Release TCP/IP, Flush DNS, Reset Proxy
If the problem is bad TCP and IP, resetting a few network-related settings will always work. This will fix the fluctuation of your network and make it stable. To reset Winsock, we are going to use the Command Prompt. So, launch Command Prompt as an administrator and use the following commands to reset Winsock. After resetting Winsock, we need to release TCP/IP. To do that, use the following command. To flush DNS, use the following command. To reset the Proxy, use the following command. Alternatively, you could use this batch file to release TCP/IP, Flush DNS, Reset Winsock, Reset Proxy. Finally, restart your computer and check if the issue persists.
3] Enable DHCP Client Service
The issue can be as lame as a disabled Service. In some cases, disabled DHCP Client Service is causing the error. So, to fix it, we are going to enable the Service. To do that, launch Services from the Start Menu, look for “DHCP Client” from the list of services, right-click on it and select Run. If if the service is running, it is better to restart it and check if it fixes the issue. Finally, restart your computer and check if the issue is fixed.
4] Disable Firewall Temporarily
If the problem still persists, try disabling Windows Firewall temporarily to release and renew the IP Address. But make sure that you are not downloading any file in the meantime as your computer is vulnerable to viruses and malware.
5] Use Network Reset
If nothing works, you can use Network Reset to reinstall Network adapters & set networking components to default settings. Hope something here helped you. Read Next: Ethernet connection not working in Windows 11/10.

